


Hey, friends, are you picturing relaxed dinners outside, but not sure where the grill, prep space and seating should go? A little zone-by-zone planning can make your outdoor kitchen feel easy to use without turning your patio into a construction puzzle.
The goal isn’t a perfect showroom. It’s a backyard cooking station that works with your home, your traffic paths and the way you like to host. Let’s map it out.
Before choosing an island or grill, sketch your patio and mark the back door, steps, garden or pool access, dining area, and any narrow walkways. Notice where people naturally walk when they carry food outside or head back indoors.
Keep the main route around the cooking area, not through it. That way, guests aren’t squeezing behind the person at the grill, and the cook isn’t constantly stepping aside. As a planning target, allow roughly 36–42 inches for a working aisle, with more room, around 48 inches, where people need to pass each other. Your available space and local requirements may call for a different plan.
Also think about delivery and maintenance: will the grill or island fit through the access route, and can you reach its connections for service later?
A useful outdoor kitchen has a natural flow: store, prep, cook, serve. These zones can sit along one counter or wrap around an island; what matters is that each has a clear job.
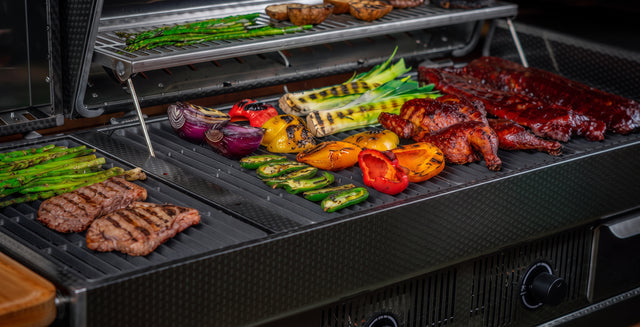
A straight run can work well along a wall or on a narrower patio. It’s simple to plan, but be thoughtful about keeping the grill away from the main route.
An L-shaped layout can separate prep and storage from cooking, while giving you a natural place to plate or serve. An island creates a social focal point, but keep seating on the guest side and cooking on the working side. Larger U-shaped layouts can offer lots of counter and storage, though you’ll want enough aisle space to avoid a cramped feel.
If you’re comparing ready-made options, browse Majic Backyard’s outdoor kitchen collection. For the cooking centerpiece itself, take a look at the outdoor grills collection.
Think about what you actually do while cooking. Do you prep vegetables outdoors, or mostly bring trays from the house? Do you cook for two, or serve a crowd? Your answers matter more than a one-size-fits-all counter measurement.
On your sketch, mark the grill first, then draw the space you’d want beside it for a tray, cutting board or hot pan. Try to reserve one continuous prep-and-landing area rather than scattering small counter sections between appliances. If space is tight, a nearby movable cart or table can add flexible room when you’re hosting.
Finally, stand or sit in the layout on paper: mark where stools pull out, cabinet doors open, and someone might walk behind a seated guest. That simple check can catch awkward pinch points before anything is installed.
Watch how the wind moves across your patio at different times of day. Ideally, smoke travels away from open doors, windows and the places where guests sit. Don’t place the grill where its lid, work area or operator blocks a doorway, stair or busy path.
A partial windbreak may make cooking more comfortable, but it must not obstruct airflow, the grill’s ventilation or a clear route out. Keep the appliance’s manufacturer instructions in charge of all clearances and installation details. A general layout guide can help you plan, but it can’t replace the manual or local rules.
Decide what will power each appliance before building cabinetry or laying a patio surface. Gas lines, propane-cylinder placement, outlets, lighting and any water connections can affect where the kitchen can go. Keep shutoffs and service points accessible, and have utility work handled to the applicable local requirements.
For example, the Black Earth 36" Hybrid Grill uses hardwood pellets and propane, with an optional natural-gas configuration. Its gas and pellet systems can be used independently or simultaneously. The pellet system requires a 115VAC grounded outlet, so plan for a suitable outlet before you settle on its position. Confirm its installation instructions and all other details on the product page.
Any roof, awning or other overhead shelter changes the ventilation and clearance questions. Never assume a grill can go beneath a roof just because it fits. Check the grill manual, local rules and any requirements for exhaust or hood ventilation. The International Code Council’s overview of outdoor-kitchen requirements is a useful starting point, but your local authority and appliance instructions determine what applies to your setup.

A sheltered spot can make the kitchen more inviting when the weather turns, but it should protect the person cooking without trapping heat or smoke around the appliance. Consider where rain tends to blow in, whether late-afternoon sun hits the work surface, and how the cook can stay comfortable without blocking ventilation.
The AFA A-Plus Luxury Lift-Up Outdoor Kitchen Pod is a modular outdoor kitchen island with a lift-up gate. If you’re considering it, check its product page for specifications and the planning details relevant to your space.

When cooking season winds down, give the setup a little attention before the weather changes:
For a final plan review, mark the grill, prep and storage zones, seating, traffic paths, wind direction, connections and shelter on one sketch. Check the appliance manual and local requirements before you build.
Your outdoor kitchen doesn’t have to be elaborate to feel like a glow-up. Start with the way you cook and gather, then shape the zones around your routine. If you’d like a second set of eyes on your plan, we’d be happy to help you think it through.